Summary
Trend Micro delivers File Reputation Services and Web Reputation Services to Apex One Agents and Smart Protection Sources.
Smart protection sources provide File Reputation Services by hosting the majority of the virus/malware pattern definitions. Security Agents host the remaining definitions. The agent sends scan queries to smart protection sources if its own pattern definitions cannot determine the risk of the file. Smart protection sources determine the risk using identification information.
Smart protection sources provide Web Reputation Services by hosting web reputation data previously available only through Trend Micro hosted servers. The agent sends web reputation queries to smart protection sources to check the reputation of websites that a user is attempting to access. The agent correlates a website’s reputation with the specific web reputation policy enforced on the endpoint to determine whether access to the site will be allowed or blocked.
The smart protection source to which the agent connects depends on the agent location. Agents can connect to either Trend Micro Smart Protection Network or to an Standalone Local Smart Protection Server.
Standalone Local Smart Protection Servers are for users who have access to their local corporate network. They localize smart protection services to the corporate network to optimize efficiency.
Standalone Smart Protection Server installs on a VMware or Hyper-V server. The standalone server has a separate management console and is not managed from the Apex One web console.
To configure Local Smart Protection Server for Apex One SaaS:
- Download Smart Protection Server from this link and then deploy it.
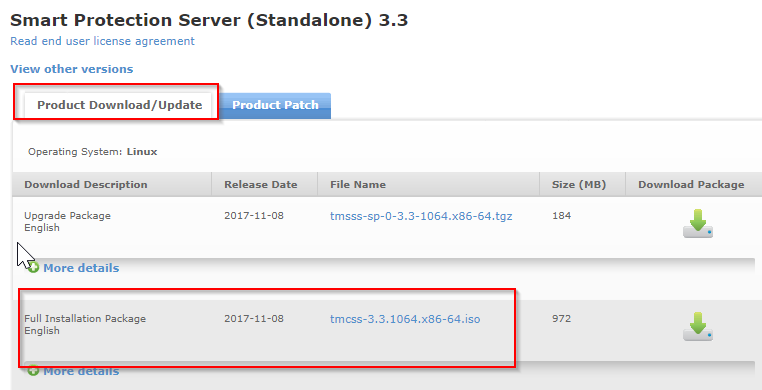
- Upgrade Smart Protection Server to the latest version and patch.
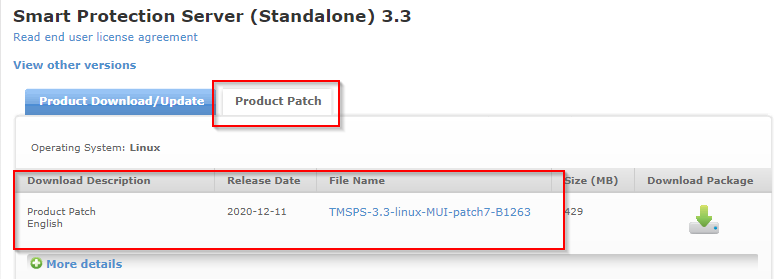
- Configure Apex One SaaS to use Local Smart Protection Server:
- Access the Apex One SaaS console via Apex Central SaaS.

- Go to Smart Protection Sources configuration.
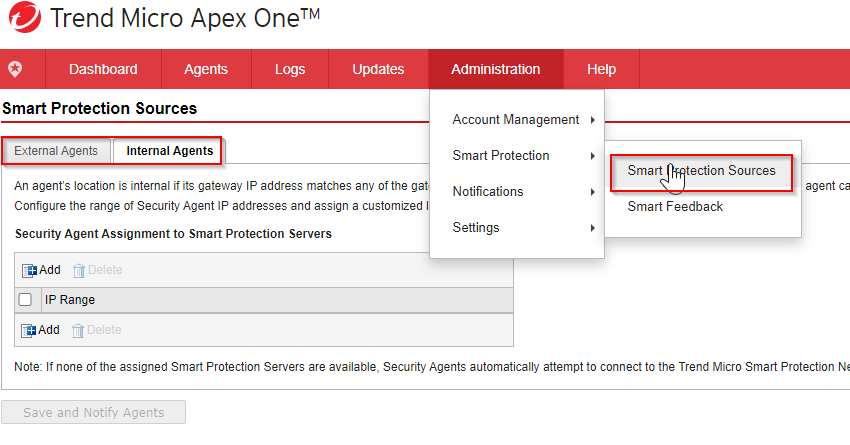
- Review your current deployment to determine if you would need Endpoint Location configuration.
More information about Endpoint Location configuration can be found in
this link.
There are two tabs, one for External Agents and one for Internal Agents.

For Internal Agents:
- Click Add.
- Add the agents (IP Range) that will use a specific Standalone Smart Protection Server as Smart Protection Source.
- Specify if it will be used for File Reputation, Web Reputation or both.
You may add several Smart Protection Servers if needed.
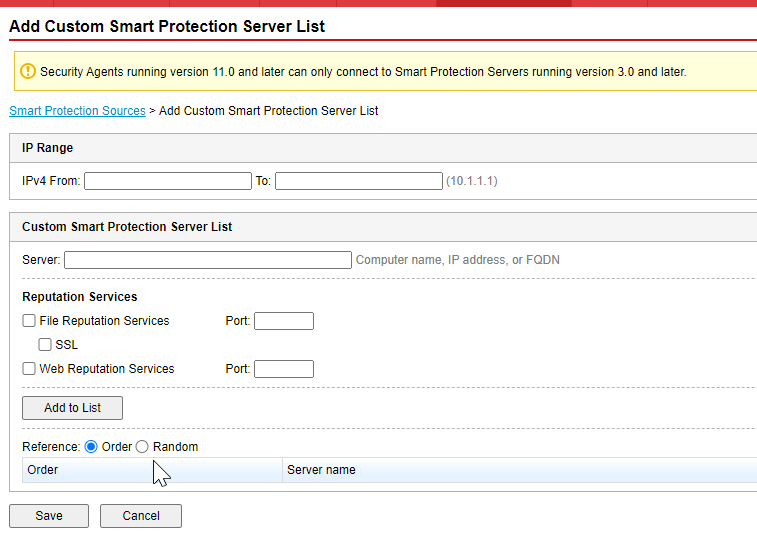
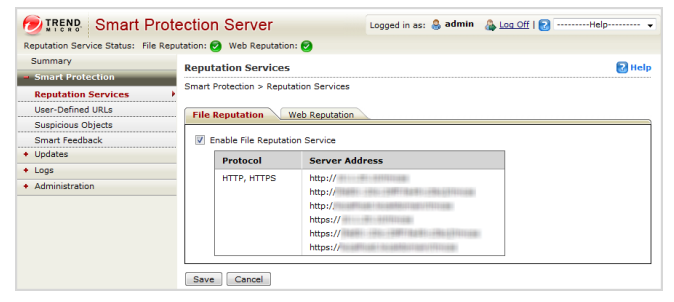
Details about FQDN and port used by Smart Protection Server can be found accessing Smart Protection Server web console. Below is the Smart Protection Server web console and where you can find the FQDN and ports for File and Web Reputation.
- Once you have added as many IP Ranges as needed, click Save and notify agents.


