Summary
Apex One agents can log and block all connections made between endpoints and addresses in the Global C&C IP list. You can also log, but still allow access to IP addresses configured in the User-defined Blocked IP List.
Apex One agents can also monitor connections that may be the result of a botnet or other malware threat. After detecting a malware threat, Apex One agents can attempt to clean the infection.
To enable Suspicious Connection Service:
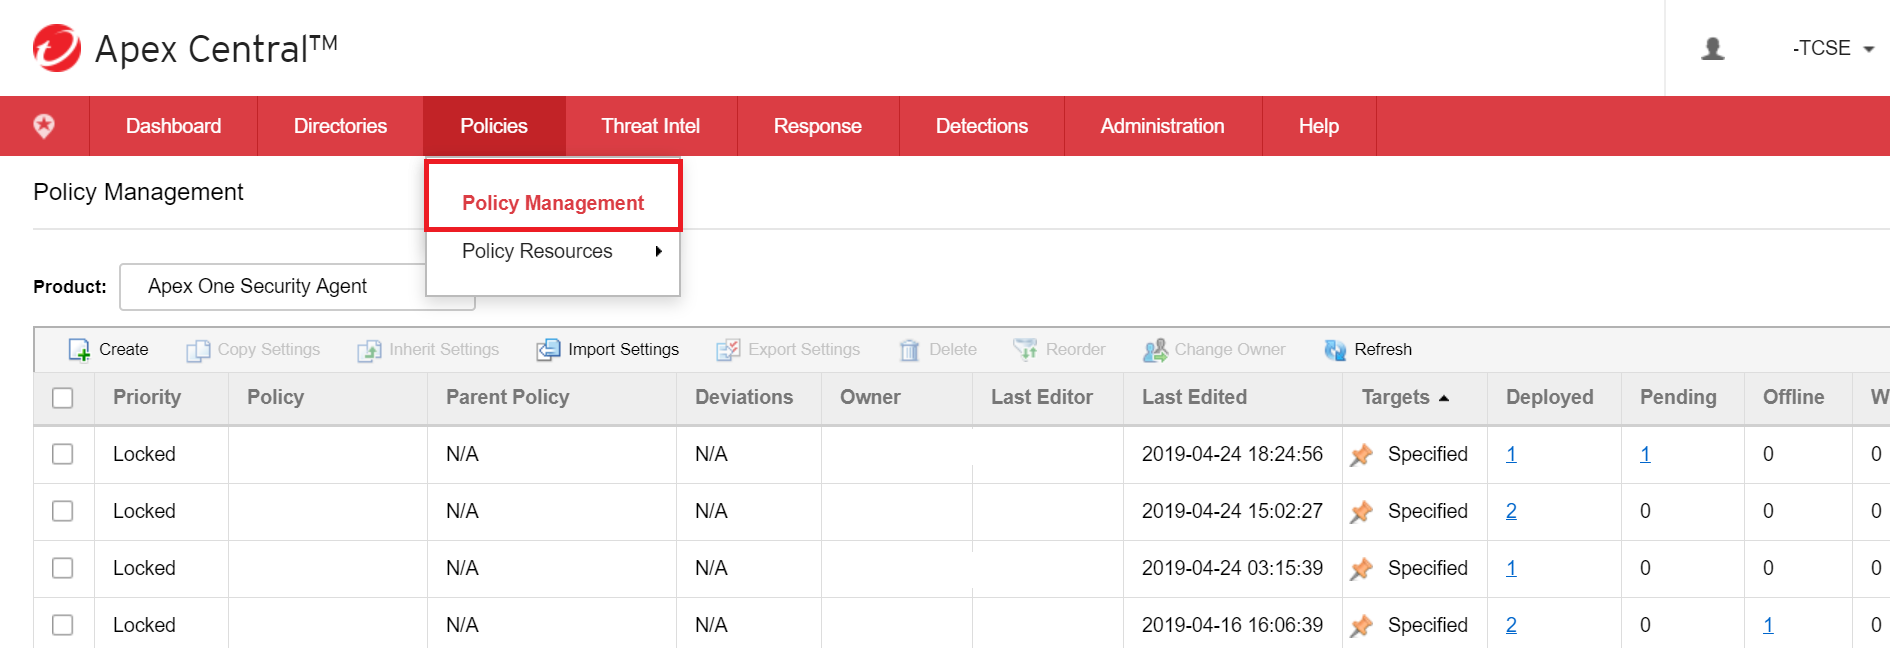
- Log in to the Apex Central Management console, and go to Policies > Policy Management.
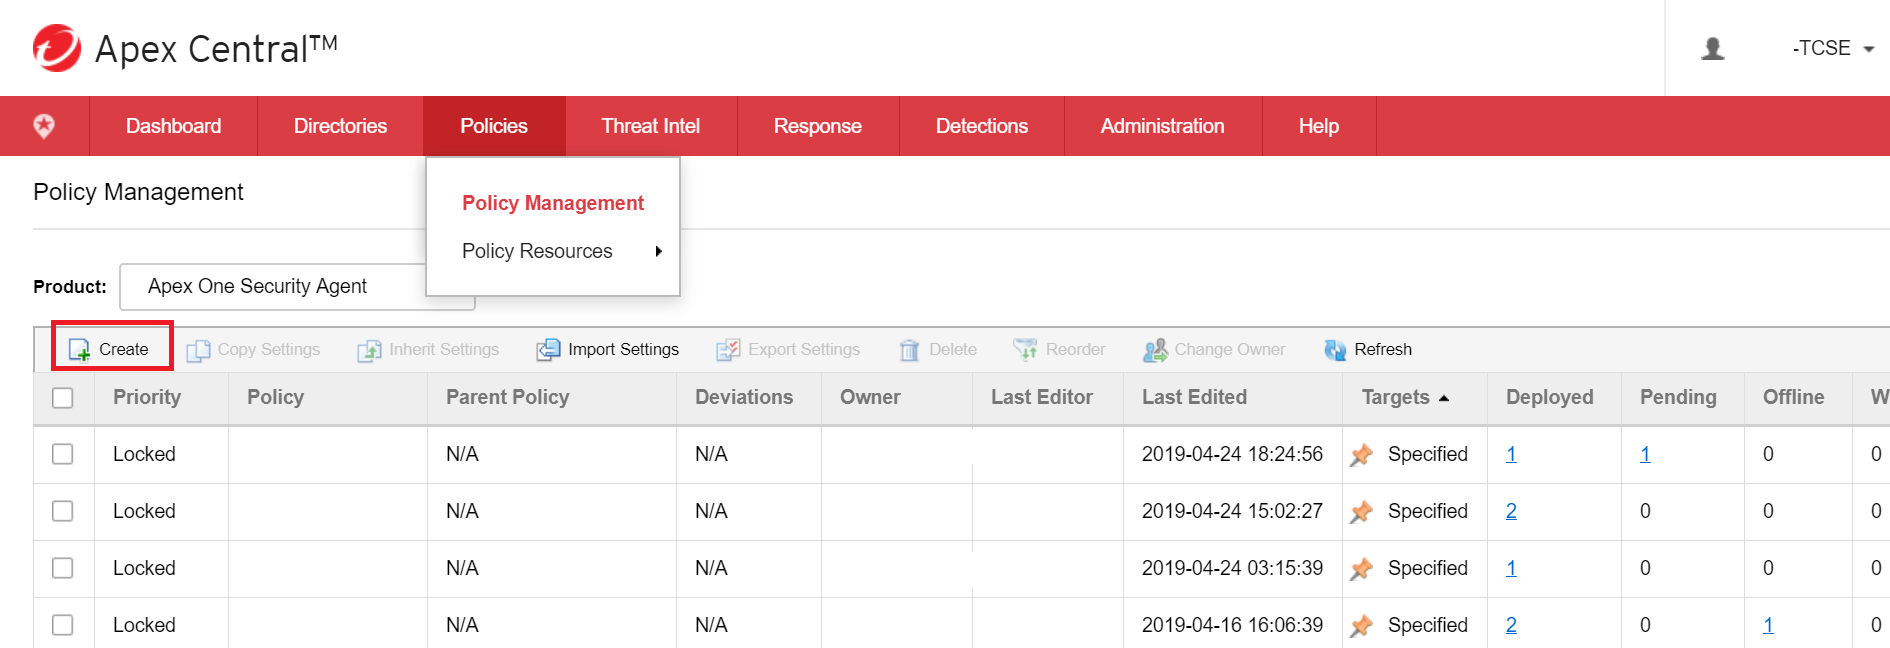
- Click Create.
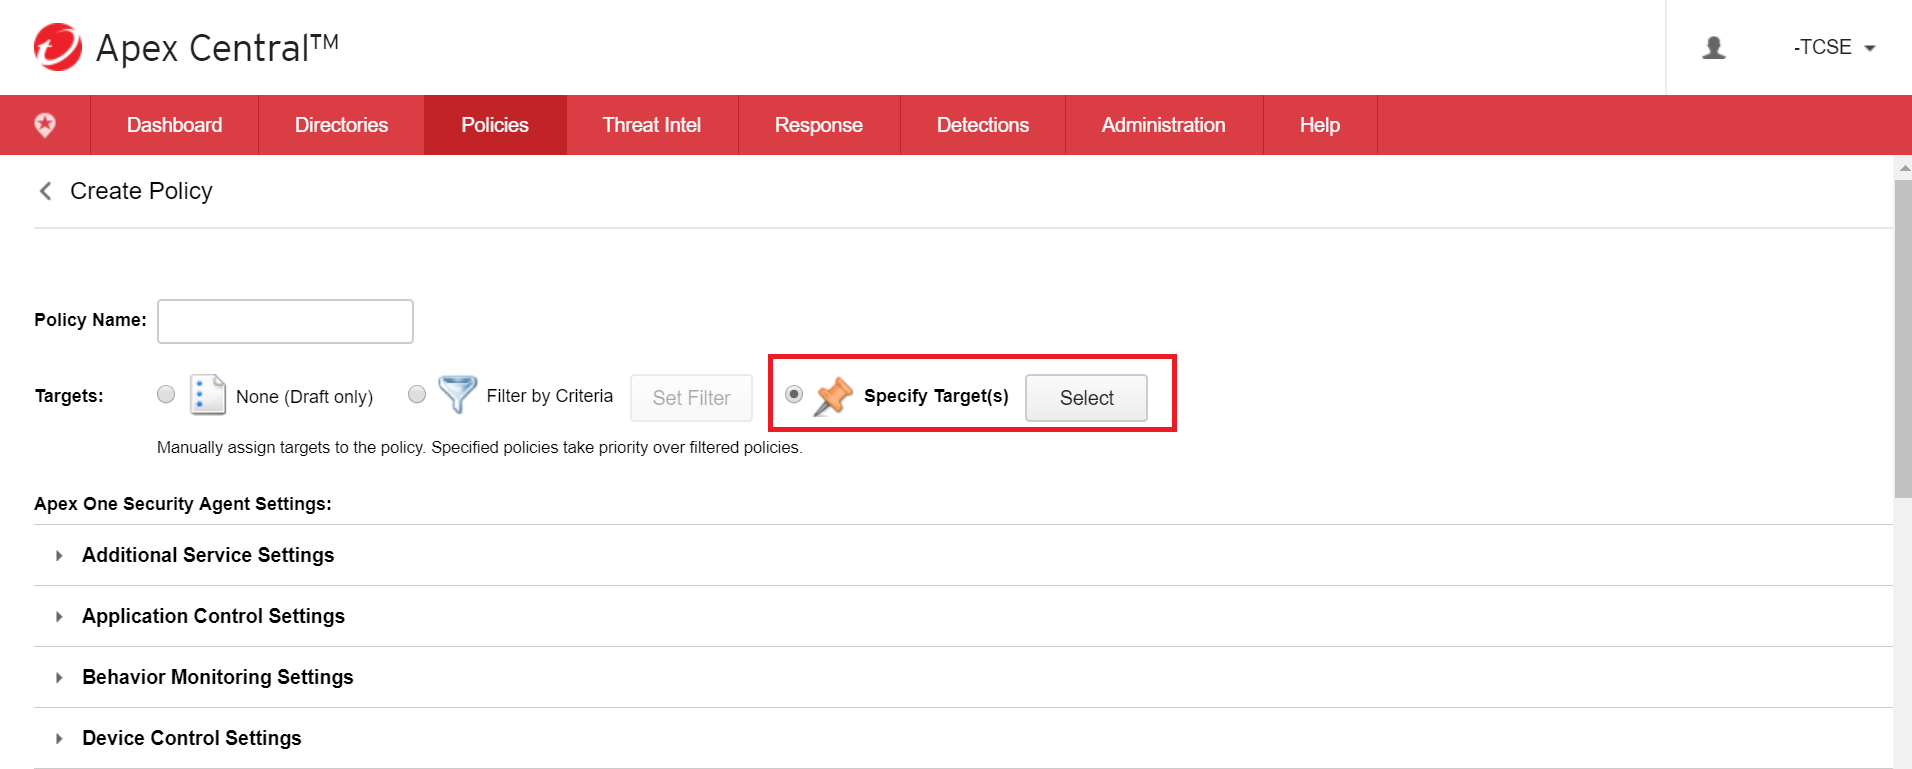
- Create Policy name.
- Select “Specify Target(s)” and click Select.
- Assign a target to policy.
Specifying Target can be done multiple ways:
- Match Keywords (Hostname/Apex Central display name/Apex Once domain heirarchy)

- IP Address
- Operating System
- Browse the Product Directory
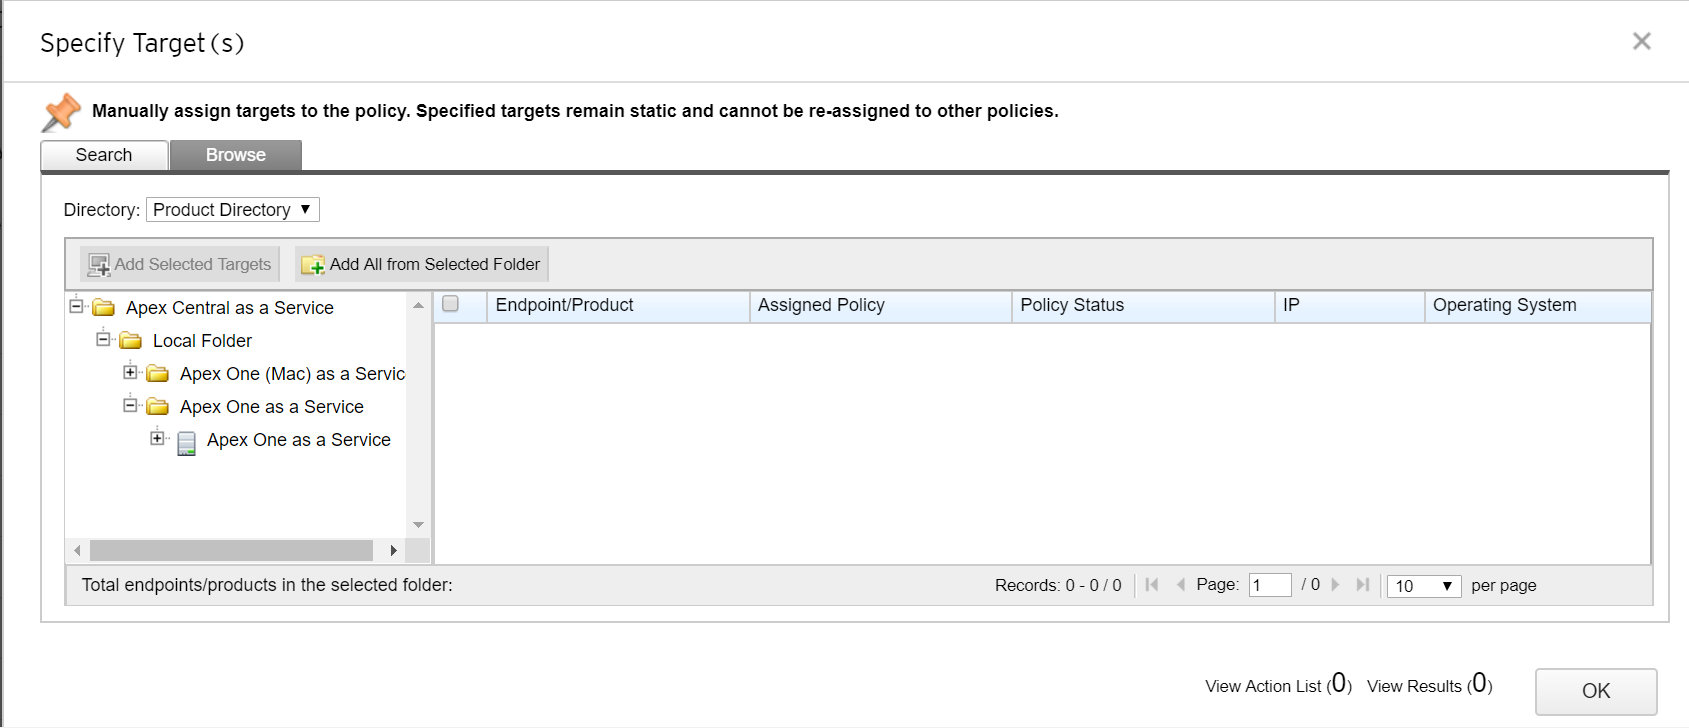
- Once a target is selected, click Add selected Targets > Ok.
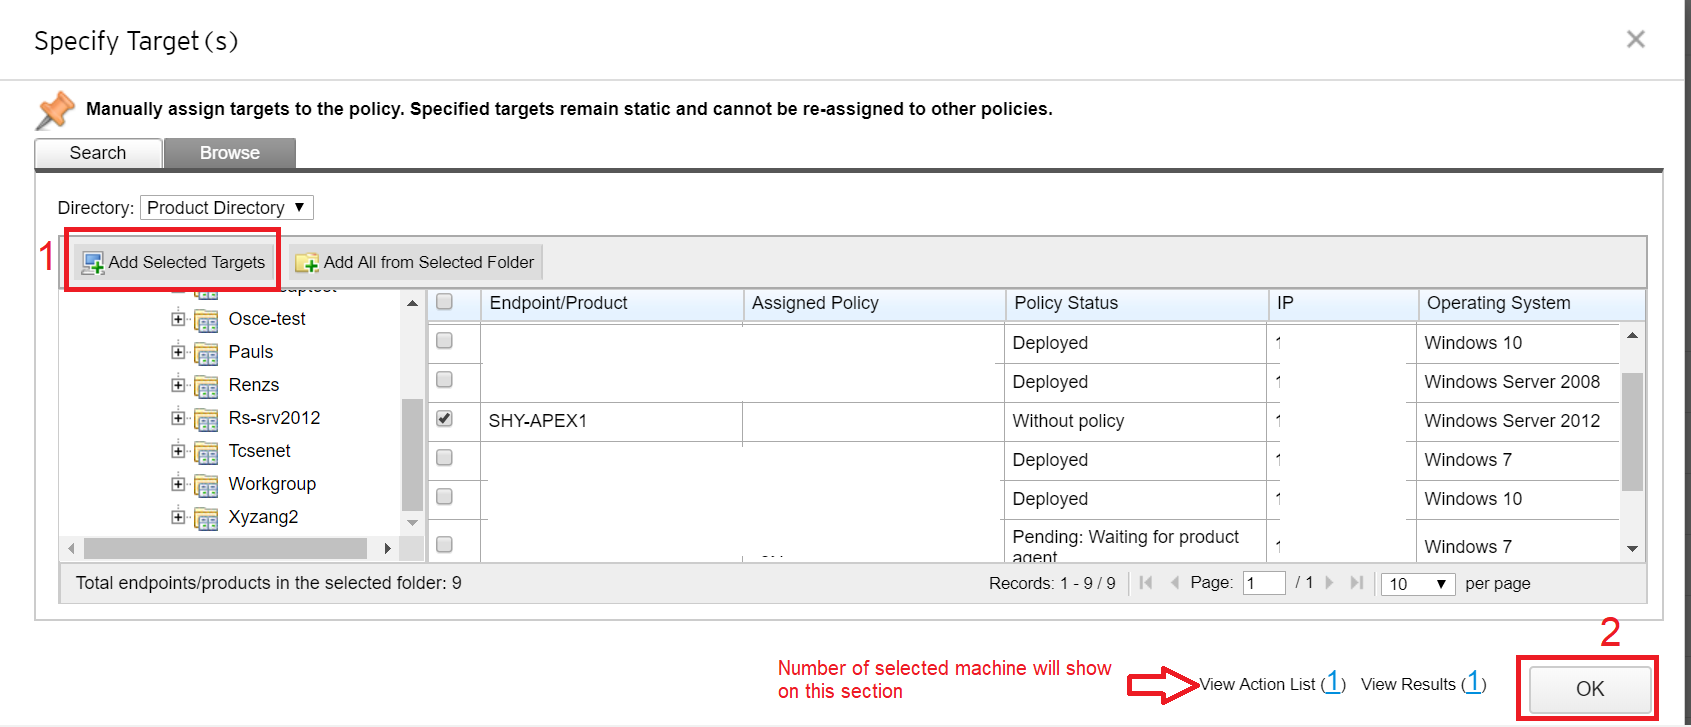
The page will be redirected back to Policy management.
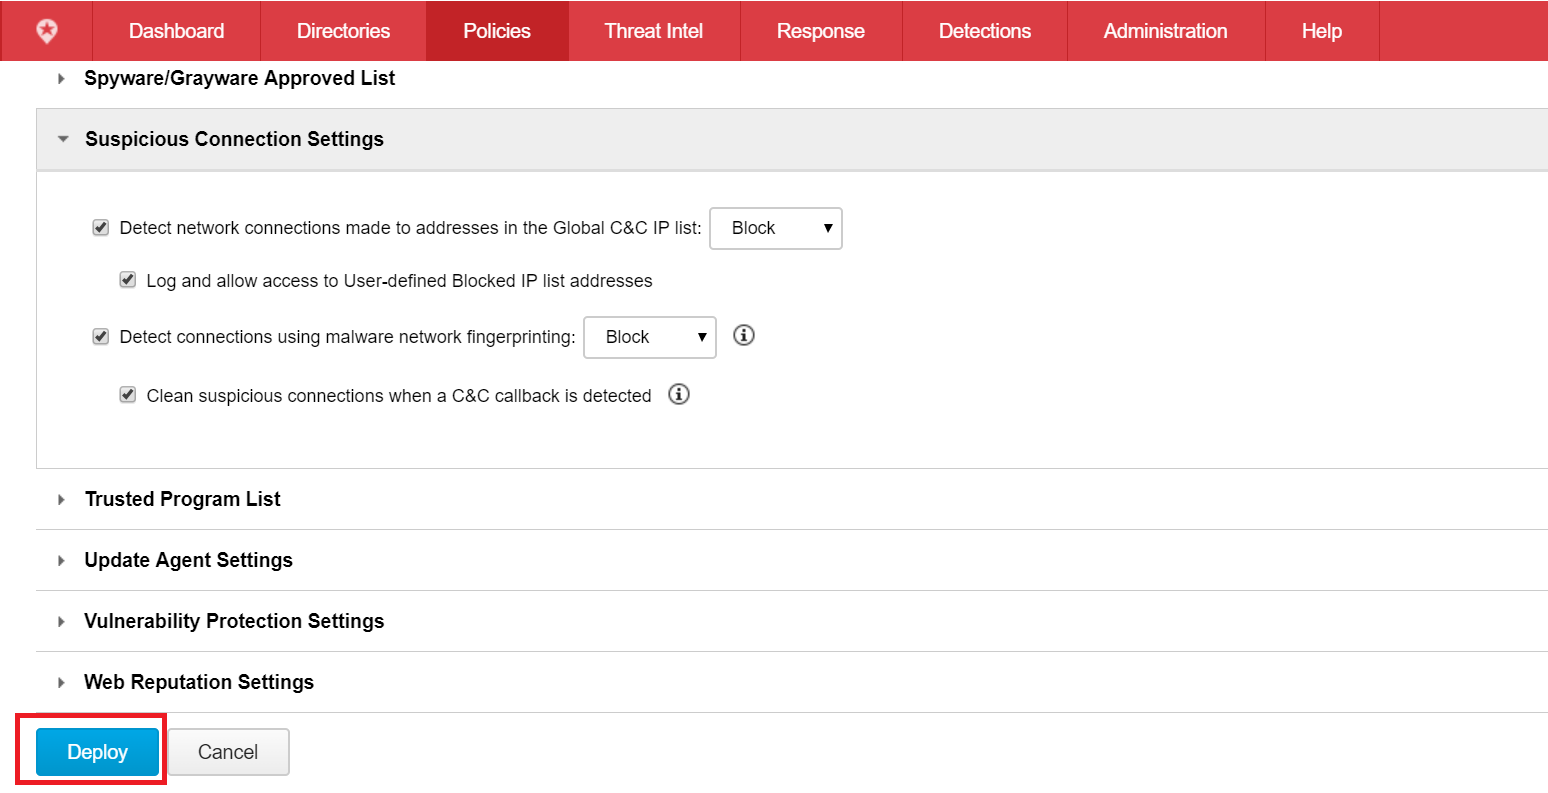
- Scroll down and look for Suspicious Connection Settings, then click the drop-down.
- Enable the following:
- Detect network connections made to addresses in the Global C&C IP list
- Detect connections using malware network fingerprinting:
- Indicate the action as either BLOCK or LOG

- Click Deploy.
- Go to the Apex One Management console > Agents tab > Agent Management.
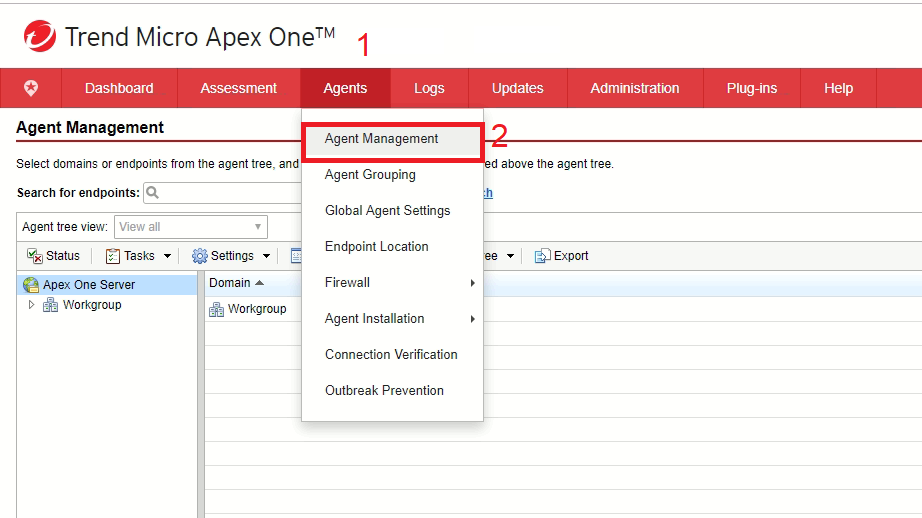
- Select the Group to configure.
- Click Settings > Suspicious Connection Settings.
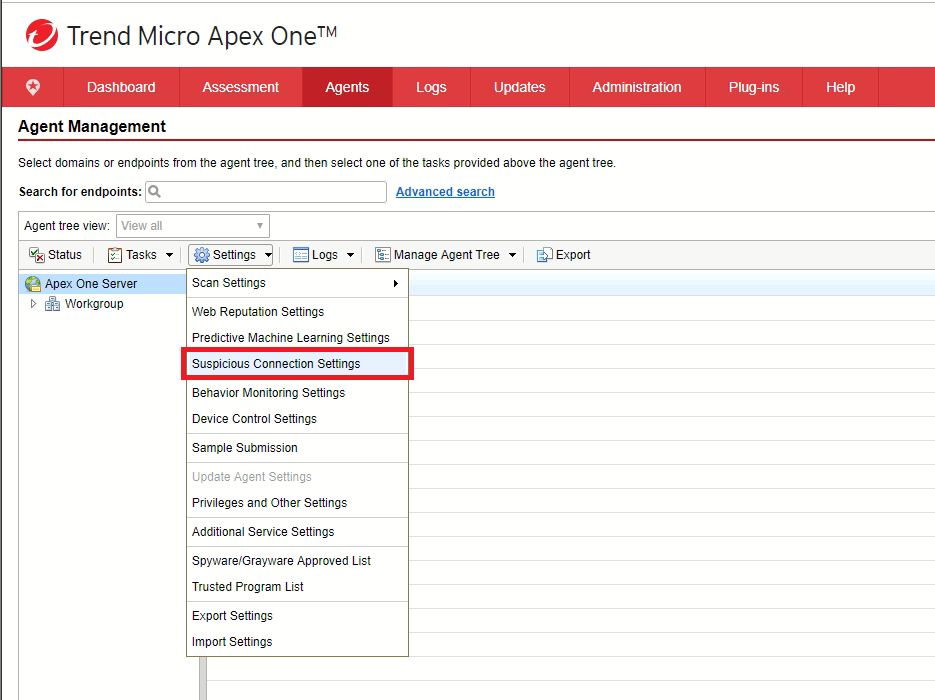
- Enable the following:
- Detect network connections made to addresses in the Global C&C IP list
- Detect connections using malware network fingerprinting:
- Indicate the action as either BLOCK or LOG

- Click Apply To all Agents/Apply to Future Domains Only.


